Blog
How to Put on a Corset in 4 Easy Steps
Step 1
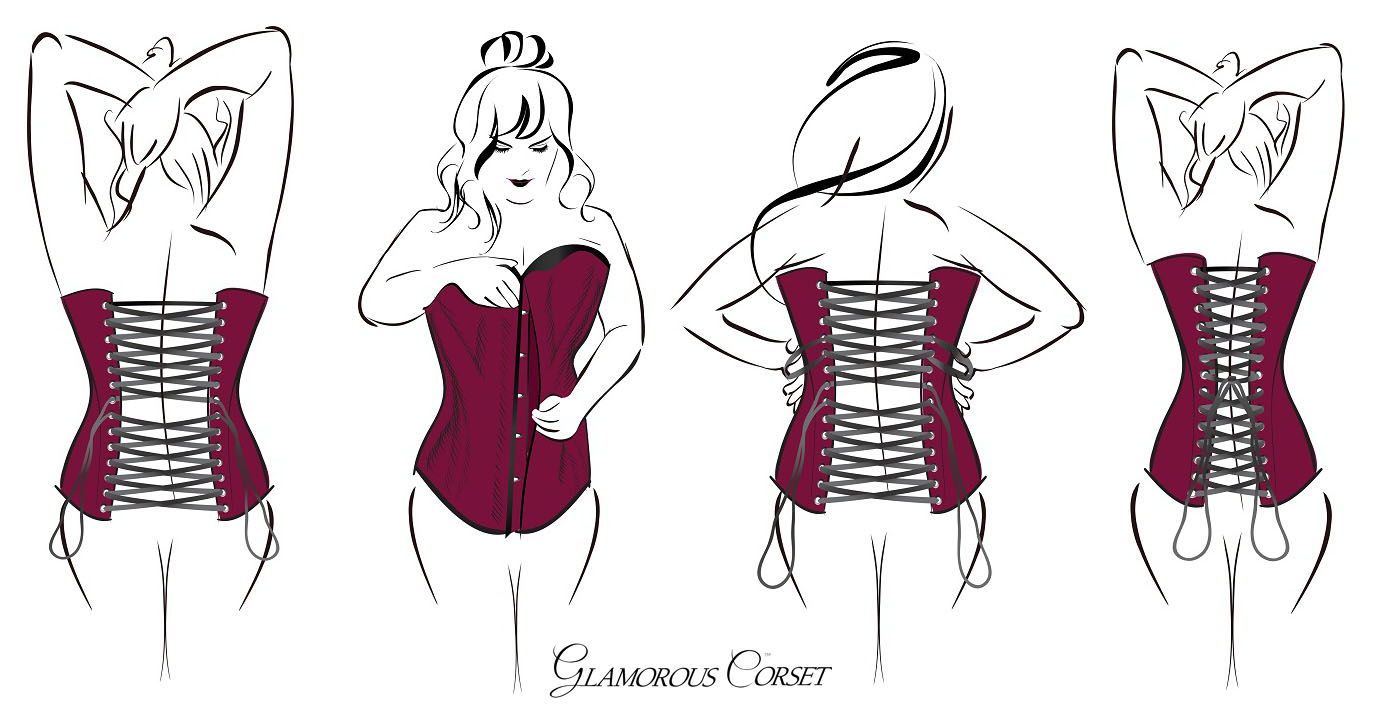
Start with your corset very loosely laced at the back. Wrap it around yourself.
Step 2
Carefully line up the two sides of your busk on the front of the corset – the ‘busk’ is the pair of metal plates that clip together at the front. Line up the pins and the holes and clip the busk together.
Step 3
Now it’s time to start tightening the lacing. Starting from the top, pull the laces a little tighter then move the loose lace down until it reaches the large loops at the middle of the lacing holes. Next, go to the bottom of the lacing and pull the laces tighter there. Again, work the loose loops of lacing up through the corset to the large loops in the middle.
Alternate the above steps, working the top half of the lacing tighter then working the bottom half of the lacing tighter. Try to keep the sides of the corset roughly parallel. When you are finished lacing, both sides should be of equal length. After a few repeats you will find the corset has reached a comfortable point, like being hugged tightly.
Step 4
Tie off the loose lacing by making a bow on the back of your corset. Enjoy wearing your corset!

My name is Rachel, I am the owner of Glamorous Corset, a small business founded by me in 2010. Back In 2005, I was in a car accident that left me with a herniated disk. Much to my surprise I learned steel boned corsets were beneficial to several medical injuries including mine. I was always intrigued with corsetry, their history and their beautiful aesthetic. I love sharing knowledge about corsets, educating my wonderful readers and breaking the negative stigma related to corsetry. In combination with my years of research and personal experience I hope my articles are useful and can help anyone who has struggled with some of the same things I have. More about me…


